How to Upload a Latex to Overleaf
In this guide, we promise to requite you your first introduction to LaTeTen. The guide does not require you to have any prior noesis of 50aTdue eastX, simply past the time you are finished, y'all will take written your offset LaTeX certificate, and hopefully will have a skillful cognition of some of the basic functions provided past LaTeastX.
Contents
- 1 What is LaTe10?
- two Why learn FiftyaTeX?
- 3 Writing your first piece of LaTeastwardX
- 4 The preamble of a document
- 5 Adding a championship, author and appointment
- 6 Adding comments
- seven Bold, italics and underlining
- 8 Calculation images
- 8.1 Captions, labels and references
- 9 Creating lists in LaTe10
- 9.i Unordered lists
- ix.ii Ordered lists
- x Adding math to LaTeX
- 11 Bones Formatting
- 11.i Abstracts
- 11.2 Paragraphs and newlines
- xi.3 Chapters and Sections
- 12 Creating tables
- 12.1 Creating a simple table in 50aTeX
- 12.2 Adding borders
- 12.3 Captions, labels and references
- 13 Adding a Table of Contents
- 14 Downloading your finished document
What is LaTeastwardX?
LaTe10 (pronounced LAY-tek or LAH-tek) is a tool used to create professional-looking documents. Information technology is based on the WYSIWYM (what you lot see is what you mean) thought, meaning yous only have focus on the contents of your document and the computer volition take care of the formatting. Instead of spacing out text on a folio to control formatting, as with Microsoft Word or LibreOffice Author, users tin can enter plain text and let 50aTdue eastX take intendance of the residual.
Why learn LaTdue eastX?
LaTeastwardX is used all over the world for scientific documents, books, as well as many other forms of publishing. Not but can it create beautifully typeset documents, but information technology allows users to very rapidly tackle the more complicated parts of typesetting, such as inputting mathematics, creating tables of contents, referencing and creating bibliographies, and having a consequent layout beyond all sections. Due to the huge number of open source packages available (more than on this afterward), the possibilities with LaTeX are endless. These packages permit users to exercise even more with 50aTeastward10, such as add footnotes, draw schematics, create tables etc.
One of the most important reasons people utilise FiftyaTeastTen is that it separates the content of the document from the fashion. This means that once you lot have written the content of your document, we can change its appearance with ease. Similarly, you can create 1 mode of certificate which can exist used to standardise the appearance of many dissimilar documents. This allows scientific journals to create templates for submissions. These templates have a pre-made layout significant that merely the content needs to be added. In fact there are hundreds of templates available for everything from CVs to slideshows.
Writing your start piece of FiftyaTe10
The first step is to create a new LaTdue east10 project. You can do this on your ain estimator by creating a new .tex file, or else you lot can start a new project in Overleaf. Let's offset with the simplest working instance:
\documentclass {article} \brainstorm {document} First document. This is a simple example, with no extra parameters or packages included. \stop {document}

Yous can see that LaTeTen has already taken care of the first piece of formatting for you, past indenting the first line of the paragraph. Permit's have a close look at what each part of our code does.
Open up an example in Overleaf
The get-go line of code declares the blazon of document, known equally the class. The class controls the overall appearance of the document. Unlike types of documents will require different classes i.e. a CV/resume will require a unlike class than a scientific paper. In this case, the class is article , the simplest and almost common FiftyaTeX grade. Other types of documents you may be working on may require dissimilar classes such as book or report.
Subsequently this, you write the content of our document, enclosed inside the \begin{document} and \end{document} tags. This is known as the body of the document. Yous can start writing hither and make changes to the text if yous wish. To meet the issue of these changes in the PDF you have to compile the document. To do this in Overleaf, simply hit Recompile . (Yous tin can too set your project to automatically recompile when you edit your files, by clicking on the small arrow next to the 'Recompile button and set 'Car Compile to 'On .)
If you lot are using a basic text editor such as gedit, emacs, vim, sublime, notepad etc., you volition have to compile the document manually. To practise this, simply run pdflatex <your document> in your computers concluding/control line. See here for more than information on how to practise this.
If you are using a dedicated LaTeX editor such as TeXmaker or TeXworks, simply hit the Recompile push button. Consult the programs documentation if you are unsure of where this is.
At present that y'all have learnt how to add content to our document, the next footstep is to give it a title. To practise this, we must talk briefly about the preamble.
The preamble of a document
In the previous example the text was entered after the \begin{document} command. Everything in your .tex file before this point is called the preamble. In the preamble you define the type of document you are writing, the language yous are writing in, the packages you would similar to utilise (more than on this later) and several other elements. For instance, a normal document preamble would look like this:
\documentclass [12pt, letterpaper] {article} \usepackage [utf8] {inputenc}
Beneath a detailed description of each line:
-
\documentclass[12pt, letterpaper]{article} - Equally said before, this defines the type of document. Some additional parameters included in the square brackets can be passed to the command. These parameters must exist comma-separated. In the example, the extra parameters fix the font size (
12pt) and the paper size (letterpaper). Of class other font sizes (9pt,11pt,12pt) tin be used, but if none is specified, the default size is10pt. As for the paper size other possible values area4paperandlegalpaper; meet the commodity about Folio size and margins for more than details well-nigh this.
-
\usepackage[utf8]{inputenc} - This is the encoding for the document. Information technology tin be omitted or changed to another encoding just utf-8 is recommended. Unless you specifically need another encoding, or if you are unsure virtually it, add this line to the preamble.
To add together a title, writer and appointment to our document, you must add three lines to the preamble (NOT the main torso of the certificate). These lines are
-
\championship{First document} - This is the title.
-
\author{Hubert Farnsworth} - Hither you put the proper noun of the Author(s) and, as an optional addition, you can add the next command inside the curly braces:
-
\thanks{funded by the Overleaf squad} - This tin be added after the name of the writer, inside the braces of the
authorcontrol. It will add together a superscript and a footnote with the text inside the braces. Useful if you need to thank an institution in your commodity.
-
\engagement{February 2014} - Y'all tin enter the appointment manually or use the command
\todayso the date will be updated automatically at the fourth dimension you compile your document
With these lines added, your preamble should look something like this
\documentclass [12pt, letterpaper, twoside] {article} \usepackage [utf8] {inputenc} \title {Kickoff document} \author {Hubert Farnsworth \thanks {funded past the Overleaf team}} \date {February 2017}
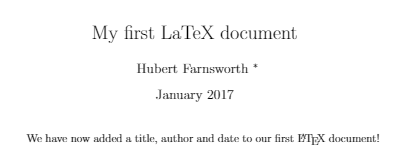
Now that you accept given your document a title, author and date, y'all tin can print this data on the certificate with the \maketitle command. This should be included in the torso of the certificate at the place you lot want the title to be printed.
\brainstorm {document} \maketitle Nosotros have now added a championship, author and date to our start \LaTeX {} document! \cease {document}
Open an example in Overleaf
As with whatever lawmaking you are writing, it tin often be useful to include comments. Comments are pieces of text you lot tin include in the certificate which will not be printed, and will not affect the document in any style. They are useful for organizing your piece of work, taking notes, or commenting out lines/sections when debugging. To brand a annotate in FiftyaTdue eastX, but write a % symbol at the beginning of the line as shown below:
\begin {document} \maketitle We have at present added a title, author and engagement to our commencement \LaTeX {} document! % This line here is a annotate. It will not be printed in the document. \end {certificate}
Open up an example in Overleaf
Bold, italics and underlining
We will at present look at some elementary text formatting commands.
- Assuming: Bold text in LaTeX is written with the
\textbf{...}command. - Italics: Italicised text in LaTeX is written with the
\textit{...}command. - Underline: Underlined text in LaTeX is written with the
\underline{...}command.
An example of each of these in activity is shown below:
Some of the \textbf {greatest} discoveries in \underline {science} were made by \textbf { \textit {blow}}.

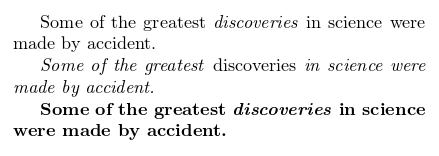
Another very useful command is the \emph{...} command. What the \emph control actually does with its statement depends on the context - within normal text the emphasized text is italicized, but this behaviour is reversed if used inside an italicized text- encounter instance below:
Some of the greatest \emph {discoveries} in science were fabricated past accident. \textit {Some of the greatest \emph {discoveries} in scientific discipline were fabricated past blow.} \textbf {Some of the greatest \emph {discoveries} in scientific discipline were made past blow.}
Moreover, some packages, e.yard. Beamer, change the behaviour of \emph command.
Open up an example in Overleaf
Adding images
We will now look at how to add images to a LaTeX document. On Overleaf, you will get-go have to upload the images.
Below is a example on how to include a picture.
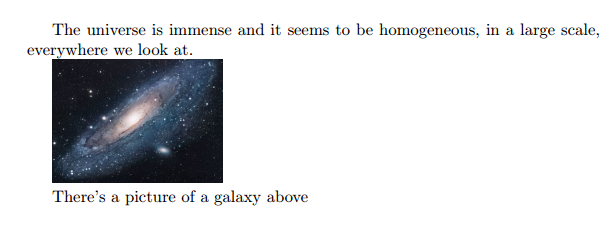
\documentclass {article} \usepackage {graphicx} \graphicspath { {images/} } \begin {document} The universe is immense and information technology seems to be homogeneous, in a big calibration, everywhere nosotros await at. \includegraphics {universe} There's a picture of a milky way in a higher place \stop {document}
Open an example in Overleaf
LaTeTen tin can not manage images by itself, and then you will need to use a package. Packages can exist used to change the default look of your LaTe10 document, or to allow more than functionalities. In this case, you need to include an epitome in our document, then yous should use the graphicx parcel. This package gives new commands, \includegraphics{...} and \graphicspath{...} . To use the graphicx package, include the following line in you preamble: \usepackage{graphicx}
The control \graphicspath{ {images/} } tells LaTeX that the images are kept in a binder named images under the current directory.
The \includegraphics{universe} control is the one that actually included the image in the document. Here universe is the name of the file containing the image without the extension, then universe.PNG becomes universe. The file proper name of the paradigm should not contain white spaces nor multiple dots.
Note: The file extension is immune to be included, but it's a proficient idea to omit it. If the file extension is omitted information technology will prompt LaTeX to search for all the supported formats. It is as well usually recommended to use lowercase messages for the file extension when uploading prototype files. For more details meet the section about generating loftier resolution and low resolution images.
Captions, labels and references
Images can be captioned, labelled and referenced by means of the figure environment every bit shown beneath:
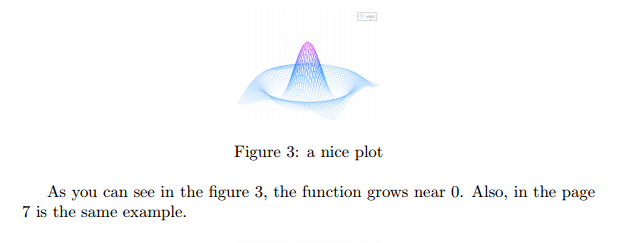
\brainstorm {figure}[h] \centering \includegraphics [width=0.25\textwidth] {mesh} \caption {a dainty plot} \label {fig:mesh1} \end {figure} Equally you tin can see in the figure \ref {fig:mesh1}, the function grows near 0. Also, in the page \pageref {fig:mesh1} is the same example.
Open an example in Overleaf
There are three important commands in the example:
-
\caption{a overnice plot}: Equally you may expect this control sets the caption for the figure. If you lot create a listing of figures this caption will be used there. Y'all can place information technology above or beneath the figure.
-
\characterization{fig:mesh1}: If you need to refer the paradigm within your document, prepare a label with this command. The label will number the paradigm, and combined with the next control will allow y'all to reference it.
-
\ref{fig:mesh1}: This code will be substituted by the number corresponding to the referenced figure.
When placing images in a 50aTe10 document, nosotros should ever put them inside a figure environment or like so that FiftyaTeX will position the epitome in a mode that fits in with the rest of your text.
Note: If you are using captions and references on your ain calculator, you will have to compile the document twice for the references to work. Overleaf will practice this for you automatically.'
Creating lists in LaTeX
Lists are very unproblematic to create in LaTdue eastX. You lot can create lists using different listing environments. Environments are sections of our document that you lot want to present in a different style to the rest of the document. They beginning with a \begin{...} control and end with an \end{...} control.
There are two main different types of lists, ordered lists and unordered lists. Each volition use a different environment.
Unordered lists
Unordered lists are produced past the catalog environment. Each entry must be preceded by the control sequence \detail every bit shown below.
\brainstorm {itemize} \item The individual entries are indicated with a black dot, a so-chosen bullet. \item The text in the entries may be of any length. \end {itemize}

By default the individual entries are indicated with a black dot, so-called bullet. The text in the entries may be of any length.
Open up an example in Overleaf
Ordered lists
Ordered list have the same syntax inside a unlike environs. Nosotros make ordered lists using the enumerate surround:
\begin {enumerate} \detail This is the first entry in our list \detail The list numbers increment with each entry we add \end {enumerate}

Equally with unordered lists, each entry must be preceded past the command sequence \detail , which volition automatically generate the number labelling the item. The enumerate labels consists of sequential numbers starting at i.
Open an example in Overleaf
Calculation math to LaTeX
One of the principal advantages of LaTeTen is the ease at which mathematical expressions can be written. LaTeastwardX allows two writing modes for mathematical expressions: the inline mode and the display mode. The first i is used to write formulas that are part of a text. The 2d one is used to write expressions that are not office of a text or paragraph, and are therefore put on dissever lines. Let'southward run into an example of the inline style:
In physics, the mass-energy equivalence is stated by the equation $ E = mc^ 2 $, discovered in 1905 by Albert Einstein.

To put your equations in inline fashion use ane of these delimiters: \( ... \) , $ ... $ or \begin{math} ... \end{math} . They all work and the pick is a thing of taste.
The displayed mode has two versions: numbered and unnumbered.
The mass-energy equivalence is described by the famous equation \[ Eastward = mc^ 2 \] discovered in 1905 by Albert Einstein. In natural units ($ c = 1 $), the formula expresses the identity \brainstorm {equation} E=g \end {equation}
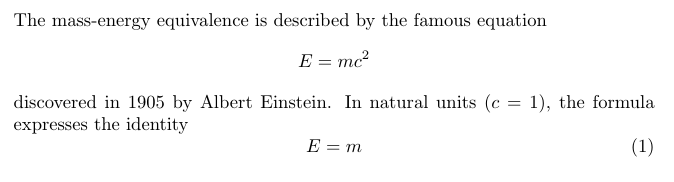
To print your equations in display mode employ one of these delimiters: \[ ... \] , \begin{displaymath} ... \cease{displaymath} or \brainstorm{equation} ... \end{equation} . $$ ... $$ is discouraged as information technology can give inconsistent spacing, and may not work well with some math packages.
Important Note: equation* environment is provided by an external package, consult the amsmath article.
Open an example in Overleaf
Many math mode commands require the amsmath package, and then exist sure to include it when writing math. An case is shown beneath of some basic math fashion commands.
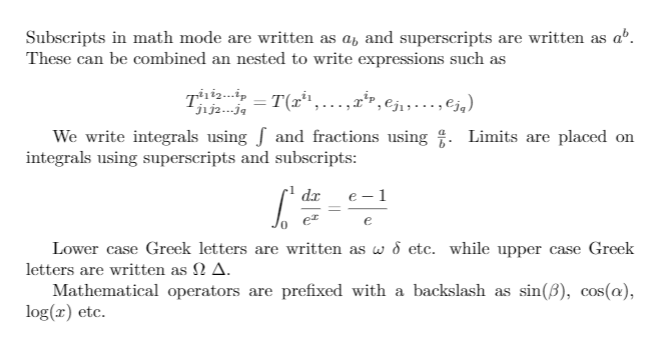
Subscripts in math mode are written as $ a_b $ and superscripts are written as $ a^b $. These can be combined an nested to write expressions such as \[ T^{i_ 1 i_ 2 \dots i_p}_{j_ 1 j_ ii \dots j_q} = T ( ten^{i_ ane }, \dots ,10^{i_p},e_{j_ 1 }, \dots ,e_{j_q} ) \] Nosotros write integrals using $ \int $ and fractions using $ \frac {a}{b} $. Limits are placed on integrals using superscripts and subscripts: \[ \int _ 0 ^ ane \frac {dx}{e^x} = \frac {e - one }{e} \] Lower case Greek letters are written as $ \omega $ $ \delta $ etc. while upper case Greek letters are written equally $ \Omega $ $ \Delta $. Mathematical operators are prefixed with a backslash as $ \sin ( \beta ) $, $ \cos ( \alpha ) $, $ \log ( x ) $ etc.
Open an case in Overleaf
The possibilities with math in LaTdue eastX are endless and it is impossible to listing them all here. Be sure to bank check out our other articles on
- Mathematical expressions
- Subscripts and superscripts
- Brackets and Parentheses
- Fractions and Binomials
- Adjustment Equations
- Operators
- Spacing in math mode
- Integrals, sums and limits
- Display style in math style
- List of Greek letters and math symbols
- Mathematical fonts
Basic Formatting
We will now look at how to write abstracts, equally well equally how to format a 50aTeX document into different capacity, sections and paragraphs.
Abstracts
In scientific documents it'due south a mutual practice to include a cursory overview of the primary subject of the paper. In FiftyaTeastTen there'due south the abstract environment for this. The abstract environment volition put the text in a special format at the top of your document.
\begin {certificate} \begin {abstract} This is a simple paragraph at the beginning of the document. A brief introduction about the main bailiwick. \end {abstract} \cease {certificate}

Open an example in Overleaf
Paragraphs and newlines
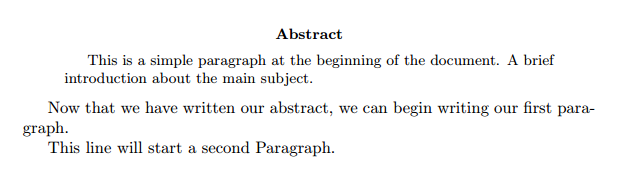
\begin {document} \brainstorm {abstract} This is a simple paragraph at the beginning of the document. A cursory introduction about the main subject field. \end {abstract} Now that we have written our abstruse, we can begin writing our offset paragraph. This line will offset a second Paragraph. \end {document}
Open an example in Overleaf
When writing the contents of your certificate, if you demand to first a new paragraph you must hit the "Enter" central twice (to insert a double blank line). Notice that LaTeastwardX automatically indents paragraphs.
To start a new line without actually starting a new paragraph insert a pause line point, this tin can be done by \\ (a double backslash as in the example) or the \newline control.
Care should be taken that multiple \\ or \newlinesouth are not used to "simulate" paragraphs with larger spacing between them, every bit this tin can interfere with LaTeTen's typesetting algorithms. The recommended method to do so is to keep using double bare lines to create new paragraphs without any \\, and so add together \usepackage{parskip} to the preamble.
You can observe more than information in the Paragraphs and new lines article.
Chapters and Sections
Commands to organize a document vary depending on the certificate type, the simplest class of organization is the sectioning, bachelor in all formats.
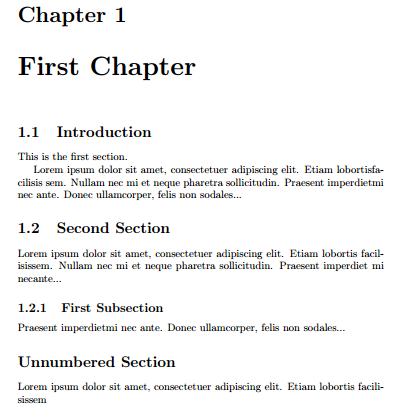
\chapter {First Chapter} \section {Introduction} This is the get-go department. Lorem ipsum dolor sit down amet, consectetuer adipiscing elit. Etiam lobortisfacilisis sem. Nullam nec mi et neque pharetra sollicitudin. Praesent imperdietmi nec ante. Donec ullamcorper, felis non sodales... \department {Second Section} Lorem ipsum dolor sit amet, consectetuer adipiscing elit. Etiam lobortis facilisissem. Nullam nec mi et neque pharetra sollicitudin. Praesent imperdiet mi necante... \subsection {First Subsection} Praesent imperdietmi nec ante. Donec ullamcorper, felis not sodales... \department* {Unnumbered Section} Lorem ipsum dolor sit amet, consectetuer adipiscing elit. Etiam lobortis facilisissem
Open an example in Overleaf
The command \section{} marks the beginning of a new section, within the braces is gear up the title. Section numbering is automatic and can be disabled by including a * in the section command every bit \section*{} . Nosotros can also accept \subsection{} s, and indeed \subsubsection{} due south. The basic levels of depth are listed below:
| -i | \office{part} |
| 0 | \chapter{chapter} |
| i | \department{department} |
| 2 | \subsection{subsection} |
| 3 | \subsubsection{subsubsection} |
| 4 | \paragraph{paragraph} |
| 5 | \subparagraph{subparagraph} |
Note that \part and \chapter are only bachelor in study and volume document classes.
For a more than complete give-and-take nearly the certificate structure see the commodity nigh sections and chapters.
Creating tables
Creating a simple tabular array in LaTeTen
Below you can see the simplest working example of a tabular array
\begin {center} \brainstorm {tabular}{ c c c } cell1 & cell2 & cell3 \\ cell4 & cell5 & cell6 \\ cell7 & cell8 & cell9 \end {tabular} \cease {center}
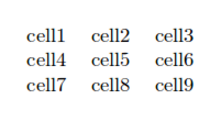
The tabular environment is the default LaTeX method to create tables. Yous must specify a parameter to this environment, in this case {c c c} . This tells LaTdue eastX that at that place will be iii columns and that the text inside each one of them must be centred. You can too use r to align the text to the correct and fifty for left alignment. The alignment symbol & is used to specify the breaks in the table entries. There must ever be ane less alignment symbol in each line than the number of columns. To get to the next line of your table, nosotros utilise the new line command \\ . Nosotros wrap the entire table inside the middle environment and then that it volition appear in the center of the page.
Open an example in Overleaf
Adding borders
The tabular environment is more than flexible, you can put separator lines in betwixt each cavalcade.
\brainstorm {center} \begin {tabular}{ |c|c|c| } \hline cell1 & cell2 & cell3 \\ cell4 & cell5 & cell6 \\ cell7 & cell8 & cell9 \\ \hline \end {tabular} \end {center}
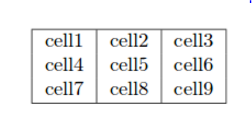
Yous tin add borders using the horizontal line command \hline and the vertical line parameter | .
-
{ |c|c|c| }: This declares that three columns, separated by a vertical line, are going to be used in the table. The|symbol specifies that these columns should be separated past a vertical line.
-
\hline: This will insert a horizontal line. Nosotros have included horizontal lines at the top and bottom of the table hither. There is no restriction on the number of times you can apply\hline.
Below y'all can see a second case.
\brainstorm {middle} \brainstorm {tabular}{||c c c c||} \hline Col1 & Col2 & Col2 & Col3 \\ [0.5ex] \hline\hline ane & half-dozen & 87837 & 787 \\ \hline 2 & 7 & 78 & 5415 \\ \hline 3 & 545 & 778 & 7507 \\ \hline iv & 545 & 18744 & 7560 \\ \hline 5 & 88 & 788 & 6344 \\ [1ex] \hline \end {tabular} \finish {middle}

Creating tables in LaTeastTen can exist a chip catchy sometimes, and so you may desire to apply the TablesGenerator.com online tool to export LaTeTen code for tabulars. The File > Paste table data option lets you copy and paste data from spreadsheet applications.
Open an case in Overleaf
Captions, labels and references
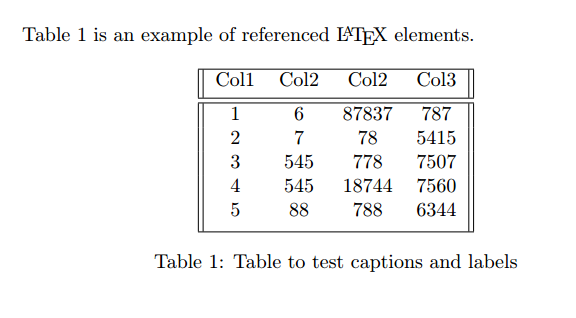
You tin can explanation and reference tables in much the aforementioned fashion as images. The only divergence is that instead of the figure surroundings, you utilize the table environment.
Table \ref {table:data} is an instance of referenced \LaTeX {} elements. \begin {table}[h!] \centering \begin {tabular}{||c c c c||} \hline Col1 & Col2 & Col2 & Col3 \\ [0.5ex] \hline\hline i & 6 & 87837 & 787 \\ 2 & 7 & 78 & 5415 \\ iii & 545 & 778 & 7507 \\ iv & 545 & 18744 & 7560 \\ 5 & 88 & 788 & 6344 \\ [1ex] \hline \cease {tabular} \caption {Tabular array to test captions and labels} \label {tabular array:data} \end {tabular array}
Open an case in Overleaf
Note: If y'all are using captions and references on your own computer, you will have to compile the document twice for the references to work. Overleaf will practice this for y'all automatically.'
Adding a Table of Contents
To create the table of contents is straightforward, the command \tableofcontents does all the piece of work for you:
\documentclass {commodity} \usepackage [utf8] {inputenc} \title {Sections and Chapters} \author {Gubert Farnsworth} \date { } \begin {document} \maketitle \tableofcontents \department {Introduction} This is the first section. Lorem ipsum dolor sit down amet, consectetuer adipiscing elit. Etiam lobortisfacilisis sem. Nullam nec mi et neque pharetra sollicitudin. Praesent imperdietmi nec dues. Donec ullamcorper, felis non sodales... \department* {Unnumbered Department} \addcontentsline {toc}{section}{Unnumbered Section} Lorem ipsum dolor sit amet, consectetuer adipiscing elit. Etiam lobortis facilisissem. Nullam nec mi et neque pharetra sollicitudin. Praesent imperdiet mi necante... \section {Second Section} Lorem ipsum dolor sit amet, consectetuer adipiscing elit. Etiam lobortis facilisissem. Nullam nec mi et neque pharetra sollicitudin. Praesent imperdiet mi necante... \end {certificate}
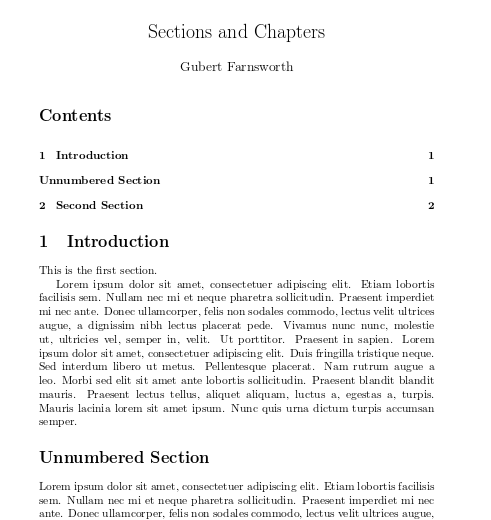
Sections, subsections and chapters are automatically included in the table of contents. To manually add entries, for case when yous want an unnumbered section, employ the command \addcontentsline equally shown in the example.
Open an example in Overleaf
Downloading your finished document
Y'all tin download your finished PDF from the left manus menu equally in a higher place past clicking PDF. In that location is also the quicker selection of clicking the Download PDF push button on your PDF viewer as shown below.

Source: https://www.overleaf.com/learn/latex/Learn_LaTeX_in_30_minutes
0 Response to "How to Upload a Latex to Overleaf"
Post a Comment