Easy Way to Dry Dog After Bath
Mrs. Obvious is a mother, wife, and mentor. She used to own her own groom shop called Puppy Love and was self-employed for nine years.
Do You Need to Blow-Dry a Dog?
To blow-dry or not to blow-dry, that is the question. Well, folks, the answer is to blow-dry. Why, you ask? For several reasons.
- Better Appearance: Blow-drying your pet until its coat is all the way "bone" dry will make it look its best. The hair will be straight, fluffy, and clean. Poodles look more professional when blow-dried, and other breeds look full of body.
- Cleaner: Your dog's hair will be cleaner after a blow-dry because a wet coat will immediately pick up all kinds of dirt if the pet is allowed to run and play while it is still wet.
- Less Stinky: Most coats that don't get dried right away will harbor some musty or moldy smells, and that defeats the point of bathing in the first place.
How Do I Blow-Dry a Dog?
So, how do you blow-dry? I'm so glad you asked.
Start With a Towel Dry
I do recommend towel drying first to get most of the moisture off and lessen the time it takes to blow-dry. Do not, for any reason, rub vigorously with the towel. The up-and-down, back-and-forth motion only makes mats and tangles in the fur! Try the squeegee method instead, pressing and squeezing all over to allow the towel to soak up as much water as possible. Then pull out your dryer and get to work!
Choose the Right Dryer Setting
Dryers nowadays have so many settings. I recommend using a warm setting on the highest airflow speed that your dryer allows. The higher the airflow, the faster the coat will dry (the amount of airflow may be noted on the box as CFM, for cubic feet per minute, or as FPM). If you are going to buy a new hairdryer soon, look to see if the CFM/FPM is noted on the box and buy the one with the highest number, especially if you have a thick-coated dog.
Use Cool Air Intermittently
If you have a button for cool air, you can use it intermittently so you don't overheat your pet. I do not recommend using only cool air. If you were wet all over, would you want to stand in front of a fan naked? No, of course not. So don't do that to your pet. If they are shivering, you should make the air a little warmer. Then blow-drying will be seen as a good thing and not as something to be avoided.
Brush the Coat With Your Free Hand
While you are blow-drying, use your free hand to brush through the coat as you go. This will help speed up the process.
Check for Mats and Other Issues
While you are brushing and drying, keep your eyes open for mats and skin problems so that you can address them later.
Types of Professional Grooming Dryers
What Kind of Blow-Dryer Should I Use to Groom a Dog?
We groomers do not use the same dryers that you buy for your hair on a retail level. We use several different types and they all have a special purpose. Force dryers, fluff dryers, and cage dryers are the main ones we use every day.
Cage Dryers
Cage dryers obviously are used to dry pets while in a cage. They usually have two relatively low airflow settings and several heat settings. It is imperative that your groomer uses a low-heat/cool setting with this dryer because it takes longer to cage dry, and pets can overheat in a cage. Pets must be checked every few minutes to ensure their safety.
The benefit of using a cage dryer is that it is less scary for animals who are very nervous, especially cats. Very young animals and also very old animals are often much more comfortable being cage dried than force dried, a process I'll explain in a minute. Still, other pets have no problem with being force dried but won't let you do their faces that way. (I don't blame them.)
Fluff/Stand Dryers
Fluff/stand dryers are similar in strength and airflow capacity to your dryer at home, but they're a lot more versatile. They usually have two knobs: one for airflow and the other for variable heat. They are on a stand and may even have a hose attached so you can have fine control over where to direct the air. Without the hose attachment, you can point the air at the dog and still have both hands free to brush at the same time. They are great for finishing off faces or other areas you find that are still damp and to get the most fluff into a pet's coat.
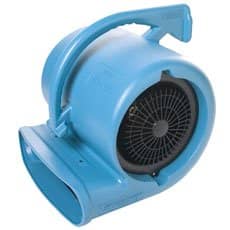
Force Dryer
Last, but not least, is the force dryer. This is my workhorse dryer that I couldn't live without. It only has a few settings: fast, faster, and fastest. Or, on some models, on and off. These dryers are not made with heating elements at all. They don't need one. Their purpose is to blast the water up and off of the coat when you hold the nozzle close to the skin. The only heat they produce is from their own motors as they get warm.
Scroll to Continue
Read More From Pethelpful
You'll notice, if you ever get the chance to use one, that it appears that dust is flying out of the coat. This is not dust; it is actually water droplets and water vapor! These dryers were made to "force" the water off the hair, thus leaving the pet dry. They can get your pet completely dry in a few minutes, versus half an hour to an hour or more with other models. Other models are made to dry the water that is on the coat. This just removes the water from the coat. Sometimes I end up wearing the water, especially on thick-coated dogs, where there is a lot to remove.
After most of the water has been removed, the leftover dampness dries very quickly. The other neat thing about force drying is that it will also blast shedding hair out of a coat, making brushing 10 times easier, and it will straighten curly coats. A straight coat is ideal for working with when cutting the hair.
How to Use a Force Dryer
A lot of dogs don't like the force dryer at first because it is very, very loud. It's like standing next to a mini jet engine. But if you slowly introduce this dryer and start on their butt, where it will feel like a massage, most dogs will allow you to use it without too much fuss once they are used to it. The important thing with this dryer is to not point it directly at the eyes, nose, ears, mouth, or genitals. That would just be mean, because it is too strong for these sensitive areas.
Avoiding Whip Knots
One other thing with force dryers that you do have to be careful about is not letting long hair form what we call "whip knots." A whip knot is formed when long hair is force-dried at an angle that allows the hair to "whip" around and double back on itself thus making a "knot" or mat.
You can easily learn to avoid doing this by watching the long hair react to the direction of the air and adjusting your angle to the skin till the hair blows out straight away from the tip of your dryer without whipping back on itself. You can also use your free hand to hold down long sections of hair so that it doesn't whip. If you weren't aware of this possibility happening, you could end up with a miserable brush-out job that you created!
Dry Your Pet the Professional Way
So now you should be able to effectively dry your pet in the least amount of time possible. To review, you should towel dry with the "squeegee" method first, brush while you dry to look for potential problems, use warm air to be fair, and watch out for the whip. Pretty soon, you'll have your pet looking like a professional did its hair every time!
This article is accurate and true to the best of the author's knowledge. It is not meant to substitute for diagnosis, prognosis, treatment, prescription, or formal and individualized advice from a veterinary medical professional. Animals exhibiting signs and symptoms of distress should be seen by a veterinarian immediately.
Leah Makdisi on December 26, 2018:
My 13 year old Pappilon is getting more and more bossy. I've given her baths and blow dries since she was 5 months old but she has begun to bite when I'm working with her hind quarters and trimming her feet. I have not been able to correct this behavior and it is escalating. What can you suggest?
Clem on March 31, 2018:
How do these dryer cost?
Willow Mattox (author) from Northern California on February 26, 2018:
HV dryer??? I'm not sure what you meant. High Volume? Well, you might have to dry longer! LOL. Try brushing while you dry if you have extra hands or can position the dryer to blow on the dog while you are brushing. If the humidity builds up in the room, this can also make it feel like they never get dry. Try opening a window to let the warm moist air out. You can also try a cooler heat setting on the dryer to help get rid of that muggy feeling. Good luck!
Bobbie on February 12, 2018:
Thank you for the tips. I do however have a question. Even after using the HV dryer and a towel it seems the dog is still damp feeling. They never feel completely dry. What do I need to do to accomplish this?
PK Haney on June 09, 2017:
Thank you for all the much needed info. I am learning to groom my rescue poodle after losing my 2 terriers. You supplied the answer to every question on my mind and all the grooming problems I have come face to face with. There is no doubt in my mind that I can now succeed doing a much better job.
Tonya on December 05, 2009:
Thank you so much for the info on dryer types. I've been using a retail human blow dryer on my puppy but now I will purchase one of the dryers you mentioned.
Source: https://pethelpful.com/dogs/Grooming-Lessons-from-a-Real-Groomer-Lesson-7-How-to-Dry-your-Pet
0 Response to "Easy Way to Dry Dog After Bath"
Post a Comment